ใน Microservices Architecture เมื่อระบบมีหลายสิบ Service ที่ทำงานร่วมกัน การให้ Client เรียก API ของแต่ละ Service โดยตรงจะมีปัญหามากมาย ทั้งเรื่อง Authentication, Rate limiting, Routing, Monitoring, Protocol transformation ทั้งหมดนี้แก้ได้ด้วย API Gateway
บทความนี้จะอธิบาย API Gateway Pattern อย่างละเอียด พร้อมสอนใช้ Kong Gateway และ Envoy Proxy ซึ่งเป็น API Gateway ที่นิยมที่สุดในปี 2026
API Gateway Pattern คืออะไร?
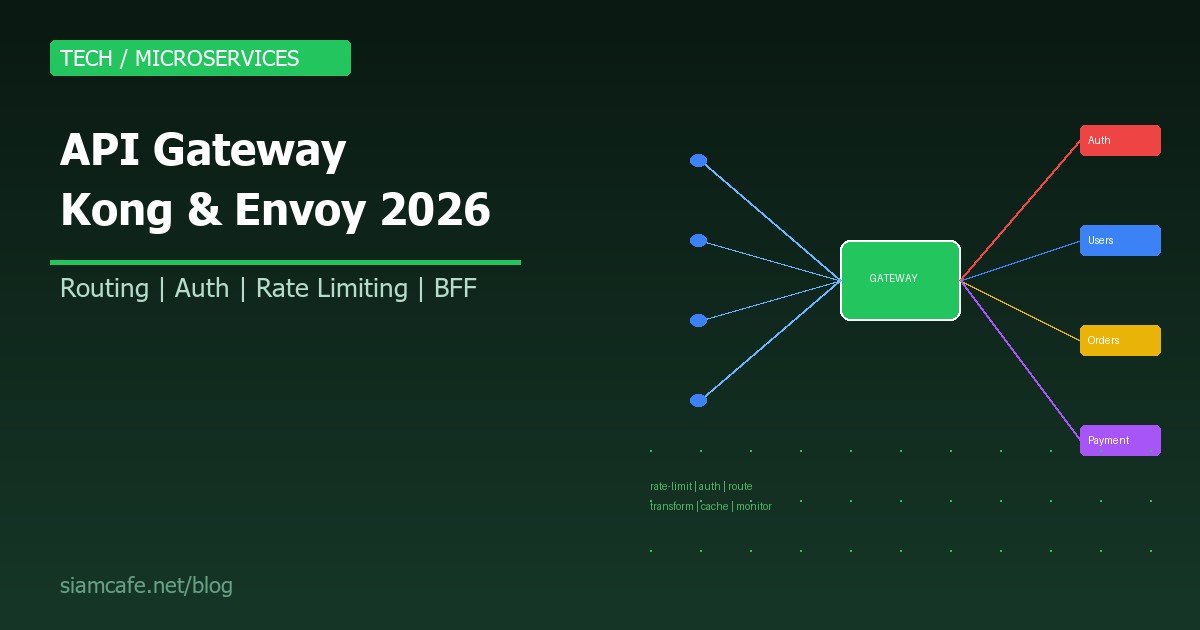
API Gateway คือจุดเข้าเดียว (Single Entry Point) ที่อยู่ระหว่าง Client กับ Backend Services ทุก Request จาก Client ต้องผ่าน Gateway ก่อน แล้ว Gateway จะ Route ไปยัง Service ที่ถูกต้อง
ทำไมต้องมี API Gateway?
// ไม่มี API Gateway — Client ต้องรู้จักทุก Service
Client → User Service     (port 8001)
Client → Order Service    (port 8002)
Client → Payment Service  (port 8003)
Client → Product Service  (port 8004)
// ปัญหา: Client ต้องจัดการ Auth, Rate limit, Error handling เอง
// ทุก Service ต้อง Expose public endpoint

// มี API Gateway — Client รู้แค่ Gateway
Client → API Gateway (port 443) → User Service
                                 → Order Service
                                 → Payment Service
                                 → Product Service
// Gateway จัดการ Auth, Rate limit, Routing, Monitoring ให้ทั้งหมด
Gateway Responsibilities — หน้าที่ของ API Gateway
| หน้าที่ | คำอธิบาย | ตัวอย่าง |
|---|---|---|
| Routing | Route Request ไปยัง Service ที่ถูกต้อง | /api/users → User Service, /api/orders → Order Service |
| Authentication | ตรวจสอบ Identity ของ Client | JWT Token validation, API Key check |
| Authorization | ตรวจสอบสิทธิ์การเข้าถึง | Admin-only endpoints, Role-based access |
| Rate Limiting | จำกัดจำนวน Request ต่อช่วงเวลา | 100 req/min per API key |
| Request/Response Transformation | แปลงรูปแบบข้อมูล | XML → JSON, Add headers, Remove fields |
| Caching | Cache Response เพื่อลด Load บน Services | Cache GET /products for 60s |
| Load Balancing | กระจาย Traffic ไปหลาย Instance | Round-robin, Least connections |
| Circuit Breaking | ตัด Traffic ไปยัง Service ที่ล่ม | ถ้า error > 50% → ส่ง fallback response |
| Logging/Monitoring | บันทึก Request ทั้งหมด | Access log, Metrics, Tracing |
| SSL/TLS Termination | จัดการ HTTPS | Client → HTTPS → Gateway → HTTP → Services |
Kong Gateway — สอนใช้งานจริง
Kong เป็น API Gateway ยอดนิยมที่สุด สร้างบน Nginx + OpenResty มีทั้ง Open Source (Kong OSS) และ Enterprise:
ติดตั้ง Kong ด้วย Docker
# Docker Compose สำหรับ Kong
# docker-compose.yml
version: '3.8'
services:
  kong-database:
    image: postgres:15
    environment:
      POSTGRES_USER: kong
      POSTGRES_DB: kong
      POSTGRES_PASSWORD: kongpass
    volumes:
      - kong-db-data:/var/lib/postgresql/data

  kong-migration:
    image: kong:3.6
    command: kong migrations bootstrap
    environment:
      KONG_DATABASE: postgres
      KONG_PG_HOST: kong-database
      KONG_PG_PASSWORD: kongpass
    depends_on:
      - kong-database

  kong:
    image: kong:3.6
    environment:
      KONG_DATABASE: postgres
      KONG_PG_HOST: kong-database
      KONG_PG_PASSWORD: kongpass
      KONG_PROXY_ACCESS_LOG: /dev/stdout
      KONG_ADMIN_ACCESS_LOG: /dev/stdout
      KONG_PROXY_ERROR_LOG: /dev/stderr
      KONG_ADMIN_ERROR_LOG: /dev/stderr
      KONG_ADMIN_LISTEN: 0.0.0.0:8001
    ports:
      - "8000:8000"   # Proxy
      - "8443:8443"   # Proxy SSL
      - "8001:8001"   # Admin API
    depends_on:
      - kong-migration

volumes:
  kong-db-data:

# เริ่มต้น
# docker compose up -d
Kong DB-less Mode (Declarative Config)
# kong.yml — Declarative Configuration
_format_version: "3.0"

services:
  - name: user-service
    url: http://user-svc:8080
    routes:
      - name: user-route
        paths:
          - /api/users
        strip_path: true

  - name: order-service
    url: http://order-svc:8080
    routes:
      - name: order-route
        paths:
          - /api/orders
        strip_path: true

plugins:
  - name: rate-limiting
    config:
      minute: 100
      policy: local

  - name: key-auth
    config:
      key_names:
        - apikey

  - name: cors
    config:
      origins:
        - "*"
      methods:
        - GET
        - POST
        - PUT
        - DELETE

# ใช้ DB-less mode
# docker run -d --name kong \
#   -e "KONG_DATABASE=off" \
#   -e "KONG_DECLARATIVE_CONFIG=/kong/kong.yml" \
#   -v ./kong.yml:/kong/kong.yml \
#   -p 8000:8000 \
#   kong:3.6
Kong Plugins ยอดนิยม
| Plugin | หน้าที่ | ตัวอย่างใช้งาน |
|---|---|---|
| rate-limiting | จำกัด Request rate | 100 req/min, 1000 req/hour |
| key-auth | Authentication ด้วย API Key | Header: apikey: abc123 |
| jwt | JWT Token validation | Authorization: Bearer token |
| oauth2 | OAuth 2.0 flow | Authorization code, Client credentials |
| cors | Cross-Origin Resource Sharing | Allow specific origins |
| request-transformer | แก้ไข Request | Add/remove headers, Change body |
| response-transformer | แก้ไข Response | Add headers, Remove fields |
| proxy-cache | Cache Response | Cache GET for 300s |
| prometheus | Metrics สำหรับ Monitoring | Grafana dashboard |
| tcp-log / http-log | ส่ง Log ไป External | ELK Stack, Splunk |
Envoy Proxy — L7 Proxy สำหรับ Cloud Native
Envoy เป็น L7 Proxy ที่ออกแบบมาสำหรับ Cloud-native applications สร้างโดย Lyft ปัจจุบันเป็น CNCF Graduated Project:
จุดเด่นของ Envoy
- xDS API: Dynamic configuration ผ่าน API ไม่ต้อง Restart
- L7 Protocol Support: HTTP/1.1, HTTP/2, gRPC, WebSocket
- Observability: Built-in stats, Tracing (Jaeger, Zipkin), Access logging
- Service Mesh Data Plane: ใช้เป็น Sidecar proxy ใน Istio
- Advanced Load Balancing: Round-robin, Least request, Ring hash, Maglev
- Circuit Breaking: Built-in ไม่ต้องเพิ่ม Library
Envoy Configuration ตัวอย่าง
# envoy.yaml
static_resources:
  listeners:
    - name: listener_0
      address:
        socket_address:
          address: 0.0.0.0
          port_value: 8080
      filter_chains:
        - filters:
            - name: envoy.filters.network.http_connection_manager
              typed_config:
                "@type": type.googleapis.com/envoy.extensions.filters.network.http_connection_manager.v3.HttpConnectionManager
                stat_prefix: ingress_http
                route_config:
                  name: local_route
                  virtual_hosts:
                    - name: backend
                      domains: ["*"]
                      routes:
                        - match:
                            prefix: "/api/users"
                          route:
                            cluster: user_service
                        - match:
                            prefix: "/api/orders"
                          route:
                            cluster: order_service
                http_filters:
                  - name: envoy.filters.http.router
                    typed_config:
                      "@type": type.googleapis.com/envoy.extensions.filters.http.router.v3.Router

  clusters:
    - name: user_service
      connect_timeout: 5s
      type: STRICT_DNS
      load_assignment:
        cluster_name: user_service
        endpoints:
          - lb_endpoints:
              - endpoint:
                  address:
                    socket_address:
                      address: user-svc
                      port_value: 8080

    - name: order_service
      connect_timeout: 5s
      type: STRICT_DNS
      lb_policy: LEAST_REQUEST
      circuit_breakers:
        thresholds:
          - max_connections: 100
            max_pending_requests: 50
            max_requests: 200
      load_assignment:
        cluster_name: order_service
        endpoints:
          - lb_endpoints:
              - endpoint:
                  address:
                    socket_address:
                      address: order-svc
                      port_value: 8080
AWS API Gateway
สำหรับคนที่ใช้ AWS, Amazon API Gateway เป็น Managed service ที่ไม่ต้องจัดการ Infrastructure:
| ประเภท | ใช้สำหรับ | ราคา |
|---|---|---|
| HTTP API | REST API ทั่วไป, Lambda integration | $1.00/ล้าน requests |
| REST API | Full-featured, API Key, Usage plans | $3.50/ล้าน requests |
| WebSocket API | Real-time, Chat, Notifications | $1.00/ล้าน messages |
# AWS API Gateway + Lambda (Serverless)
# ไม่ต้องจัดการ Server เลย
# Client → API Gateway → Lambda → DynamoDB

# สร้างด้วย AWS CDK (TypeScript)
const api = new apigateway.RestApi(this, 'MyApi', {
  restApiName: 'My Service',
  description: 'API Gateway for my microservices'
});

const usersResource = api.root.addResource('users');
usersResource.addMethod('GET', new apigateway.LambdaIntegration(getUsersLambda));
usersResource.addMethod('POST', new apigateway.LambdaIntegration(createUserLambda));
Traefik as API Gateway
Traefik เป็น Edge Router ที่นิยมใช้กับ Docker/Kubernetes เพราะ Auto-discovery:
# docker-compose.yml with Traefik
version: '3.8'
services:
  traefik:
    image: traefik:v3.0
    command:
      - "--api.insecure=true"
      - "--providers.docker=true"
      - "--entrypoints.web.address=:80"
    ports:
      - "80:80"
      - "8080:8080"  # Dashboard
    volumes:
      - /var/run/docker.sock:/var/run/docker.sock

  user-service:
    image: user-service:latest
    labels:
      - "traefik.http.routers.users.rule=PathPrefix(`/api/users`)"
      - "traefik.http.services.users.loadbalancer.server.port=8080"

  order-service:
    image: order-service:latest
    labels:
      - "traefik.http.routers.orders.rule=PathPrefix(`/api/orders`)"
      - "traefik.http.services.orders.loadbalancer.server.port=8080"

# Traefik Auto-discover services จาก Docker labels!
# ไม่ต้อง Config route เอง
API Gateway vs Service Mesh
| คุณสมบัติ | API Gateway | Service Mesh (Istio/Linkerd) |
|---|---|---|
| ตำแหน่ง | Edge (North-South traffic) | Between services (East-West traffic) |
| หน้าที่หลัก | External API management | Inter-service communication |
| Traffic type | Client → Services | Service → Service |
| Auth | External auth (JWT, API Key) | mTLS between services |
| Architecture | Centralized proxy | Sidecar proxy per service |
| Complexity | ปานกลาง | สูง |
| ใช้เมื่อ | Expose APIs to external | Secure inter-service comms |
| ใช้ร่วมกัน? | ได้! API Gateway อยู่ Edge + Service Mesh อยู่ภายใน | |
BFF Pattern (Backend for Frontend)
BFF คือ Pattern ที่สร้าง API Gateway แยกตาม Client type:
// BFF Pattern
// Mobile App → Mobile BFF Gateway → Microservices
// Web App   → Web BFF Gateway    → Microservices
// Admin     → Admin BFF Gateway  → Microservices

// ทำไมต้อง BFF?
// - Mobile ต้องการ Response ที่เล็ก (ประหยัด Bandwidth)
// - Web ต้องการ Response ที่มีข้อมูลมากกว่า
// - Admin ต้องการ Endpoint ที่ต่างจาก User
// - แต่ละ BFF ปรับแต่ง Response ให้เหมาะกับ Client

// Mobile BFF — ส่ง Response เล็ก
GET /api/user/profile → { name, avatar, badge_count }

// Web BFF — ส่ง Response ใหญ่กว่า
GET /api/user/profile → { name, avatar, badge_count, recent_orders, notifications, settings }
Gateway Security
JWT Validation
# Kong — JWT Plugin
# สร้าง Consumer
curl -X POST http://localhost:8001/consumers \
  -d "username=my-app"

# สร้าง JWT Credential
curl -X POST http://localhost:8001/consumers/my-app/jwt \
  -d "algorithm=HS256" \
  -d "secret=my-super-secret"

# เปิด JWT Plugin บน Service
curl -X POST http://localhost:8001/services/user-service/plugins \
  -d "name=jwt"

# Client ส่ง Request พร้อม JWT
curl -H "Authorization: Bearer eyJhbGciOiJIUzI1NiIs..." \
  http://localhost:8000/api/users
OAuth 2.0 Flow
# API Gateway ทำหน้าที่ OAuth Resource Server
# 1. Client ได้ Token จาก Authorization Server (Auth0, Keycloak)
# 2. Client ส่ง Token ใน Request header
# 3. Gateway ตรวจสอบ Token กับ Authorization Server
# 4. ถ้า Valid → Forward request ไป Service
# 5. ถ้า Invalid → Return 401 Unauthorized
Gateway Monitoring
# Kong + Prometheus + Grafana
# 1. เปิด Prometheus Plugin
curl -X POST http://localhost:8001/plugins \
  -d "name=prometheus"

# 2. Scrape metrics จาก Kong
# prometheus.yml
scrape_configs:
  - job_name: 'kong'
    static_configs:
      - targets: ['kong:8001']
    metrics_path: /metrics

# Metrics ที่สำคัญ:
# - kong_http_requests_total (จำนวน Request)
# - kong_request_latency_ms (Response time)
# - kong_upstream_target_health (Service health)
# - kong_bandwidth_bytes (Bandwidth usage)

# 3. สร้าง Grafana Dashboard
# - Request rate per service
# - P50, P95, P99 latency
# - Error rate
# - Upstream health
เลือก API Gateway ที่เหมาะสม
| Gateway | เหมาะกับ | จุดเด่น | จุดด้อย |
|---|---|---|---|
| Kong | ทั่วไป, Enterprise | Plugin ecosystem, Community ใหญ่ | Memory usage สูง (Lua/Nginx) |
| Envoy | Cloud-native, gRPC | Performance สูง, xDS API | Config ซับซ้อน |
| AWS API Gateway | AWS Serverless | ไม่ต้องจัดการ Infra | Vendor lock-in, แพง |
| Traefik | Docker/K8s | Auto-discovery, ง่าย | Plugin น้อยกว่า Kong |
| NGINX | ง่ายๆ ไม่ซับซ้อน | เร็วมาก, คุ้นเคย | ต้อง Config เอง ไม่มี Plugin |
| APISIX | High performance | เร็ว, Dashboard ดี | Community เล็กกว่า Kong |
สรุป
API Gateway เป็น Component ที่ขาดไม่ได้ใน Microservices Architecture ทำหน้าที่เป็น Single Entry Point จัดการ Routing, Authentication, Rate Limiting, Caching, Monitoring ให้ทั้งหมด ไม่ว่าจะเลือก Kong, Envoy, AWS API Gateway หรือ Traefik สิ่งสำคัญคือเข้าใจ Pattern และเลือกเครื่องมือที่เหมาะกับ Tech Stack ของทีม
เริ่มต้นด้วยการ Docker run Kong หรือ Traefik ขึ้นมา ลองตั้งค่า Route + Rate limiting + JWT Auth แล้วคุณจะเข้าใจว่าทำไม API Gateway ถึงเป็นหัวใจของ Modern Backend Architecture ในปี 2026