Database Replication คืออะไร? สอน HA สำหรับ PostgreSQL, MySQL และ MongoDB 2026
Database คือหัวใจของทุก Application ถ้า Database ล่ม ทุกอย่างล่มหมด ไม่ว่าจะมี Web Server กี่ตัว Load Balancer กี่ชั้น ถ้า Database เหลือเครื่องเดียวแล้วเครื่องนั้นพัง ระบบทั้งหมดจะใช้งานไม่ได้ นี่คือเหตุผลที่ Database High Availability (HA) เป็นสิ่งจำเป็นสำหรับทุกระบบที่ต้องทำงาน 24/7
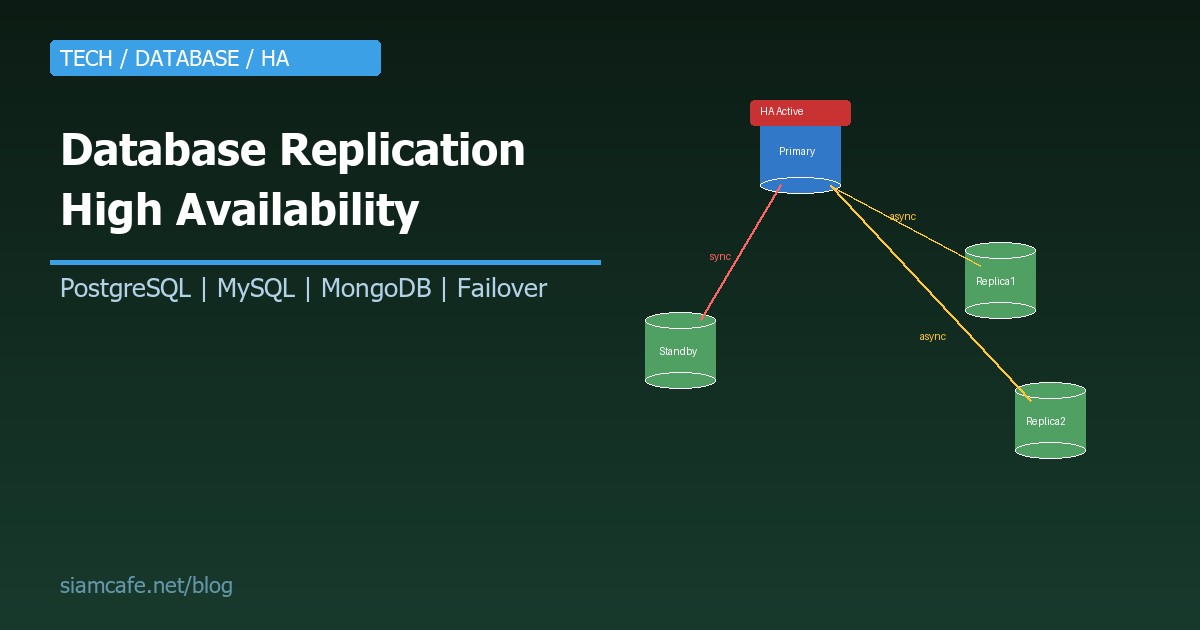
Replication คือกระบวนการ Copy ข้อมูลจาก Database server ตัวหนึ่ง (Primary/Master) ไปยัง Server ตัวอื่น (Replica/Standby) เพื่อ: สำรองข้อมูล, กระจายโหลดการอ่าน, และ Failover อัตโนมัติเมื่อ Primary ล่ม
Replication Types — ประเภทของ Replication
| ประเภท | วิธีการ | ข้อดี | ข้อเสีย | เหมาะกับ |
|---|---|---|---|---|
| Synchronous | Primary รอจน Replica ยืนยันว่าได้รับข้อมูลแล้ว จึง Commit | ข้อมูลไม่มีทาง Lost (Zero data loss) | ช้ากว่า เพราะต้องรอ Replica | ระบบที่ยอมเสียข้อมูลไม่ได้ (Banking, Healthcare) |
| Asynchronous | Primary Commit ก่อน แล้วค่อยส่งข้อมูลไป Replica | เร็วกว่า ไม่ต้องรอ | อาจ Lost ข้อมูลบางส่วนถ้า Primary ล่ม (Replication lag) | ระบบทั่วไป ที่ยอม Lost ข้อมูล 1-2 วินาทีได้ |
| Semi-synchronous | Primary รอจน Replica อย่างน้อย 1 ตัว ยืนยัน | สมดุลระหว่าง Speed + Safety | ช้ากว่า Async เล็กน้อย | ระบบที่ต้องการ Balance ระหว่าง Performance + Durability |
PostgreSQL Streaming Replication
Primary-Standby Setup
PostgreSQL ใช้ WAL (Write-Ahead Log) Streaming เป็นพื้นฐานของ Replication Primary เขียน WAL แล้ว Stream ไปให้ Standby แบบ Realtime:
# === PRIMARY SERVER ===
# postgresql.conf
wal_level = replica
max_wal_senders = 10
wal_keep_size = 1GB
synchronous_standby_names = ''   # '' = async, '*' = sync ทุกตัว

# สร้าง Replication user
CREATE USER replicator WITH REPLICATION ENCRYPTED PASSWORD 'SecurePass123!';

# pg_hba.conf — Allow replication
# TYPE  DATABASE    USER         ADDRESS           METHOD
host    replication replicator   192.168.1.0/24    md5

# Restart PostgreSQL
sudo systemctl restart postgresql

# === STANDBY SERVER ===
# หยุด PostgreSQL
sudo systemctl stop postgresql

# Backup จาก Primary
sudo -u postgres pg_basebackup -h 192.168.1.10 -U replicator -D /var/lib/postgresql/17/main -Fp -Xs -P -R

# -R จะสร้างไฟล์ standby.signal + postgresql.auto.conf อัตโนมัติ
# postgresql.auto.conf จะมี:
# primary_conninfo = 'host=192.168.1.10 port=5432 user=replicator password=SecurePass123!'

# Start Standby
sudo systemctl start postgresql

# ตรวจสอบ Replication Status (บน Primary)
SELECT client_addr, state, sent_lsn, write_lsn, flush_lsn, replay_lsn,
       pg_wal_lsn_diff(sent_lsn, replay_lsn) AS replication_lag_bytes
FROM pg_stat_replication;
Patroni — Automatic Failover สำหรับ PostgreSQL
Patroni เป็น HA solution ที่ได้รับความนิยมมากที่สุดสำหรับ PostgreSQL ทำ Automatic failover เมื่อ Primary ล่ม โดยใช้ Distributed consensus (etcd/ZooKeeper/Consul) ในการเลือก Leader:
# Architecture:
# Node1: PostgreSQL + Patroni agent
# Node2: PostgreSQL + Patroni agent
# Node3: PostgreSQL + Patroni agent
# etcd cluster (3 nodes) — สำหรับ Leader election
# HAProxy/PgBouncer — Connection routing

# ติดตั้ง Patroni
pip install patroni[etcd]

# patroni.yml (แต่ละ Node)
scope: postgres-cluster
name: node1

restapi:
  listen: 0.0.0.0:8008
  connect_address: 192.168.1.11:8008

etcd3:
  hosts: 192.168.1.21:2379,192.168.1.22:2379,192.168.1.23:2379

bootstrap:
  dcs:
    ttl: 30
    loop_wait: 10
    retry_timeout: 10
    maximum_lag_on_failover: 1048576  # 1MB
    postgresql:
      use_pg_rewind: true
      parameters:
        wal_level: replica
        max_wal_senders: 10
        max_replication_slots: 10
        hot_standby: "on"
        wal_log_hints: "on"

  initdb:
    - encoding: UTF8
    - data-checksums

postgresql:
  listen: 0.0.0.0:5432
  connect_address: 192.168.1.11:5432
  data_dir: /var/lib/postgresql/17/main
  authentication:
    superuser:
      username: postgres
      password: SuperPass!
    replication:
      username: replicator
      password: ReplPass!

# Start Patroni
patroni /etc/patroni/patroni.yml

# ตรวจ Cluster status
patronictl -c /etc/patroni/patroni.yml list
# +--------+----------+---------+---------+----+-----------+
# | Member | Host     | Role    | State   | TL | Lag in MB |
# +--------+----------+---------+---------+----+-----------+
# | node1  | 192.168.1.11 | Leader  | running |  1 |       0 |
# | node2  | 192.168.1.12 | Replica | running |  1 |       0 |
# | node3  | 192.168.1.13 | Replica | running |  1 |       0 |
# +--------+----------+---------+---------+----+-----------+

# Manual switchover (planned)
patronictl -c /etc/patroni/patroni.yml switchover --leader node1 --candidate node2

# เมื่อ node1 ล่ม → Patroni จะ Promote node2 เป็น Leader อัตโนมัติ (10-30 วินาที)
PostgreSQL Logical Replication
# Logical Replication — Replicate เฉพาะ Table/Database ที่ต้องการ
# ต่างจาก Physical replication ที่ Copy ทั้ง Instance

# บน Publisher (Source)
ALTER SYSTEM SET wal_level = logical;
-- Restart PostgreSQL

CREATE PUBLICATION my_pub FOR TABLE users, orders;
-- หรือ: FOR ALL TABLES;

# บน Subscriber (Target)
CREATE SUBSCRIPTION my_sub
  CONNECTION 'host=192.168.1.10 dbname=mydb user=replicator password=pass'
  PUBLICATION my_pub;

# ดู Status
SELECT * FROM pg_stat_subscription;
SELECT * FROM pg_stat_replication;

# Use cases:
# - Replicate เฉพาะบาง Table ไปยัง Analytics database
# - Migration ระหว่าง PostgreSQL versions (major upgrade)
# - Multi-region selective replication
MySQL Replication
Source-Replica (GTID-based)
# === SOURCE SERVER ===
# my.cnf
[mysqld]
server-id = 1
log_bin = mysql-bin
binlog_format = ROW
gtid_mode = ON
enforce_gtid_consistency = ON

# สร้าง Replication user
CREATE USER 'repl'@'%' IDENTIFIED BY 'ReplPass123!';
GRANT REPLICATION SLAVE ON *.* TO 'repl'@'%';
FLUSH PRIVILEGES;

# === REPLICA SERVER ===
# my.cnf
[mysqld]
server-id = 2
relay_log = relay-bin
read_only = ON
gtid_mode = ON
enforce_gtid_consistency = ON

# ตั้งค่า Replication
CHANGE REPLICATION SOURCE TO
  SOURCE_HOST = '192.168.1.10',
  SOURCE_USER = 'repl',
  SOURCE_PASSWORD = 'ReplPass123!',
  SOURCE_AUTO_POSITION = 1;  -- GTID auto-positioning

START REPLICA;

# ตรวจ Status
SHOW REPLICA STATUS\G
# Replica_IO_Running: Yes
# Replica_SQL_Running: Yes
# Seconds_Behind_Source: 0
MySQL Group Replication / InnoDB Cluster
# InnoDB Cluster = Group Replication + MySQL Shell + MySQL Router
# ให้ Automatic failover + Read scaling

# ใช้ MySQL Shell สร้าง Cluster
mysqlsh root@192.168.1.10

# สร้าง Cluster
dba.createCluster('myCluster')

# เพิ่ม Node
cluster = dba.getCluster()
cluster.addInstance('root@192.168.1.11')
cluster.addInstance('root@192.168.1.12')

# ดู Status
cluster.status()
# {
#   "clusterName": "myCluster",
#   "status": "OK",
#   "topology": {
#     "192.168.1.10:3306": { "status": "ONLINE", "role": "PRIMARY" },
#     "192.168.1.11:3306": { "status": "ONLINE", "role": "SECONDARY" },
#     "192.168.1.12:3306": { "status": "ONLINE", "role": "SECONDARY" }
#   }
# }

# MySQL Router — Auto-routing
# Reads → SECONDARY nodes
# Writes → PRIMARY node
mysqlrouter --bootstrap root@192.168.1.10 --directory /etc/mysqlrouter
# Application connects to Router (port 6446 for RW, 6447 for RO)
ProxySQL สำหรับ Read Scaling
# ProxySQL — MySQL proxy ที่ Route queries อัตโนมัติ
# SELECT → Replica (read scaling)
# INSERT/UPDATE/DELETE → Primary

# ติดตั้ง ProxySQL
apt install proxysql

# Configure ผ่าน Admin interface
mysql -u admin -padmin -h 127.0.0.1 -P 6032

-- เพิ่ม Backend servers
INSERT INTO mysql_servers (hostgroup_id, hostname, port) VALUES
  (10, '192.168.1.10', 3306),  -- Primary (Writer hostgroup)
  (20, '192.168.1.11', 3306),  -- Replica (Reader hostgroup)
  (20, '192.168.1.12', 3306);  -- Replica (Reader hostgroup)

-- Query rules: SELECT ไป Reader, ที่เหลือไป Writer
INSERT INTO mysql_query_rules (rule_id, active, match_pattern, destination_hostgroup)
VALUES (1, 1, '^SELECT.*FOR UPDATE', 10),  -- SELECT FOR UPDATE → Writer
       (2, 1, '^SELECT', 20);               -- SELECT → Reader

LOAD MYSQL SERVERS TO RUNTIME;
LOAD MYSQL QUERY RULES TO RUNTIME;
SAVE MYSQL SERVERS TO DISK;
SAVE MYSQL QUERY RULES TO DISK;
MongoDB Replica Sets
# MongoDB Replica Set = Primary + Secondary (+ Arbiter optional)
# Automatic election เมื่อ Primary ล่ม

# mongod.conf (ทุก Node)
replication:
  replSetName: rs0
net:
  bindIp: 0.0.0.0
  port: 27017

# เชื่อมต่อเข้า Primary แล้ว Initiate
mongosh --host 192.168.1.10

rs.initiate({
  _id: "rs0",
  members: [
    { _id: 0, host: "192.168.1.10:27017", priority: 10 },
    { _id: 1, host: "192.168.1.11:27017", priority: 5 },
    { _id: 2, host: "192.168.1.12:27017", priority: 5 }
  ]
})

# ดู Status
rs.status()
# members:
#   [0] PRIMARY  - 192.168.1.10
#   [1] SECONDARY - 192.168.1.11
#   [2] SECONDARY - 192.168.1.12

# Read Preferences — กำหนดว่าอ่านจากไหน
# primary (default): อ่านจาก Primary เท่านั้น
# primaryPreferred: อ่านจาก Primary ถ้าได้ ไม่ได้ก็อ่าน Secondary
# secondary: อ่านจาก Secondary เท่านั้น
# secondaryPreferred: อ่านจาก Secondary ถ้าได้
# nearest: อ่านจาก Node ที่ Latency ต่ำสุด

# Application connection string
mongodb://192.168.1.10:27017,192.168.1.11:27017,192.168.1.12:27017/?replicaSet=rs0&readPreference=secondaryPreferred

# Election Process:
# 1. Primary heartbeat หายไป (default 10 วินาที)
# 2. Secondary เริ่ม Election
# 3. Node ที่ได้ Majority vote (>50%) จะเป็น Primary ใหม่
# 4. ใช้เวลา ~10-15 วินาที (ระหว่างนี้ Write ไม่ได้ Read ได้จาก Secondary)
เปรียบเทียบ HA Solutions
| Feature | PostgreSQL (Patroni) | MySQL (InnoDB Cluster) | MongoDB (Replica Set) |
|---|---|---|---|
| Failover time | 10-30 วินาที | ~30 วินาที | 10-15 วินาที |
| Min nodes สำหรับ HA | 3 (PostgreSQL) + 3 (etcd) | 3 nodes | 3 nodes |
| Read scaling | ได้ (Read replicas) | ได้ (MySQL Router) | ได้ (Read preference) |
| Write scaling | ไม่ได้ (Single primary) | ได้ (Group replication multi-primary) | ไม่ได้ (Single primary) |
| Consensus | External (etcd/ZooKeeper) | Built-in (Paxos) | Built-in (Raft) |
| Connection pooling | PgBouncer | ProxySQL / MySQL Router | Driver built-in |
| Complexity | สูง (หลาย Component) | ปานกลาง | ต่ำ (Built-in) |
Connection Pooling สำหรับ HA
PgBouncer (PostgreSQL)
# PgBouncer — Connection pooler ที่เบาที่สุด
# ลดจำนวน Connection ที่ PostgreSQL ต้อง Handle

# pgbouncer.ini
[databases]
mydb = host=127.0.0.1 port=5432 dbname=mydb

[pgbouncer]
listen_addr = *
listen_port = 6432
auth_type = md5
auth_file = /etc/pgbouncer/userlist.txt
pool_mode = transaction      # transaction pooling (แนะนำ)
max_client_conn = 1000       # Max connections จาก Application
default_pool_size = 50       # Max connections ไปยัง PostgreSQL
min_pool_size = 10
reserve_pool_size = 5

# Application connects to PgBouncer (port 6432) แทน PostgreSQL (port 5432)
# 1000 app connections → PgBouncer → 50 actual DB connections
Kubernetes Operators สำหรับ Database HA
# CloudNativePG (PostgreSQL on K8s)
# Operator ที่จัดการ PostgreSQL cluster บน Kubernetes

apiVersion: postgresql.cnpg.io/v1
kind: Cluster
metadata:
  name: pg-cluster
spec:
  instances: 3
  storage:
    size: 50Gi
    storageClass: standard
  postgresql:
    parameters:
      shared_buffers: "256MB"
      max_connections: "200"
  backup:
    barmanObjectStore:
      destinationPath: s3://backups/pg
      s3Credentials:
        accessKeyId:
          name: s3-creds
          key: ACCESS_KEY_ID
        secretAccessKey:
          name: s3-creds
          key: SECRET_ACCESS_KEY

---
# Percona Operator for MySQL
apiVersion: pxc.percona.com/v1
kind: PerconaXtraDBCluster
metadata:
  name: mysql-cluster
spec:
  pxc:
    size: 3
    volumeSpec:
      persistentVolumeClaim:
        resources:
          requests:
            storage: 50Gi
  haproxy:
    enabled: true
    size: 2
Monitoring Replication Lag
# PostgreSQL — ดู Replication lag
SELECT client_addr,
       pg_wal_lsn_diff(pg_current_wal_lsn(), replay_lsn) AS lag_bytes,
       EXTRACT(EPOCH FROM (now() - pg_last_xact_replay_timestamp()))::int AS lag_seconds
FROM pg_stat_replication;

# MySQL — ดู Replication lag
SHOW REPLICA STATUS\G
# Seconds_Behind_Source: 0  (ถ้า > 0 แสดงว่ามี Lag)

# MongoDB — ดู Replication lag
rs.printReplicationInfo()
rs.printSecondaryReplicationInfo()

# Prometheus metrics สำหรับ Alert
# pg_replication_lag_seconds > 30  → Alert!
# mysql_slave_seconds_behind_master > 30  → Alert!
# mongodb_replset_member_replication_lag > 30  → Alert!
Backup กับ Replication
# PostgreSQL — Continuous backup with pgBackRest
pgbackrest --stanza=main backup --type=full

# MySQL — mysqldump + binlog
mysqldump --all-databases --single-transaction --master-data=2 > backup.sql

# MongoDB — mongodump
mongodump --host rs0/192.168.1.10:27017 --oplog --out /backup/$(date +%Y%m%d)
Split-Brain Prevention
Split-brain เกิดเมื่อ Network partition ทำให้ทั้ง Primary และ Standby คิดว่าตัวเองเป็น Primary ทั้งคู่ ทำให้ข้อมูลไม่ตรงกัน:
- PostgreSQL (Patroni): ใช้ etcd consensus ต้องได้ Majority vote (2 จาก 3) จึงจะเป็น Leader ป้องกัน Split-brain ได้
- MySQL (Group Replication): ใช้ Paxos consensus ต้องได้ Majority เช่นกัน
- MongoDB: ใช้ Raft consensus Node ต้องได้ Majority vote จึงจะเป็น Primary
- หลักการ: ต้องมี Node จำนวนคี่ (3, 5, 7) เพื่อให้ Majority vote ทำงานได้ถูกต้อง
RTO/RPO สำหรับ Database
| Metric | คืออะไร | Sync Replication | Async Replication | No Replication |
|---|---|---|---|---|
| RPO (Recovery Point Objective) | ข้อมูลที่ยอม Lost ได้สูงสุด | 0 (Zero data loss) | วินาที-นาที | ชั่วโมง-วัน (ขึ้นกับ Backup schedule) |
| RTO (Recovery Time Objective) | เวลาที่ยอม Down ได้สูงสุด | 10-30 วินาที (Auto failover) | 10-30 วินาที | นาที-ชั่วโมง (Manual recovery) |
Testing Failover
ต้องทดสอบ Failover เป็นประจำ! HA ที่ไม่เคยทดสอบก็เหมือนไม่มี:
# PostgreSQL (Patroni) — Manual failover test
patronictl -c /etc/patroni/patroni.yml switchover --leader node1 --candidate node2 --force

# MySQL (InnoDB Cluster) — Manual failover test
cluster = dba.getCluster()
cluster.setPrimaryInstance('192.168.1.12:3306')

# MongoDB — Step down Primary
rs.stepDown()  # Primary จะ Step down แล้ว Election ใหม่

# Chaos Engineering — จำลองปัญหาจริง
# 1. Kill process: sudo systemctl stop postgresql
# 2. Network partition: sudo iptables -A INPUT -s 192.168.1.10 -j DROP
# 3. Disk full: fallocate -l 100G /tmp/fill_disk
# 4. High load: stress --cpu 8 --timeout 60s

# ทดสอบแล้วต้องบันทึก:
# - Failover time (กี่วินาที)
# - Data loss (มีไหม)
# - Application impact (Error rate เท่าไหร่ระหว่าง Failover)
# - Recovery (Cluster กลับมาปกติเมื่อไหร่)
สรุป
Database HA เป็นสิ่งที่ทุกระบบ Production ต้องมี เลือก Solution ตามความเหมาะสม: PostgreSQL + Patroni สำหรับ Enterprise-grade HA, MySQL InnoDB Cluster สำหรับ MySQL ecosystem, MongoDB Replica Set สำหรับ NoSQL ที่ Setup ง่าย
สิ่งสำคัญที่สุด: ทดสอบ Failover เป็นประจำ (อย่างน้อยเดือนละครั้ง), Monitor replication lag ตลอดเวลา, Backup แยกจาก Replication (Replication ไม่ใช่ Backup!), และ Plan สำหรับ Split-brain ด้วยจำนวน Node คี่และ Consensus protocol ที่เหมาะสม
เริ่มจาก 3 Nodes (1 Primary + 2 Replicas) พร้อม Automatic failover แล้วค่อย Scale เพิ่มตามความต้องการ HA ที่ดีไม่ใช่แค่ "มีหลาย Node" แต่ต้อง "ทำงานได้จริงเมื่อเกิดปัญหา" การทดสอบอย่างสม่ำเสมอคือวิธีเดียวที่จะรู้ว่า HA ของคุณพร้อมหรือไม่